In order to be able to apply nice textures to the cart models in Unity, there are some necessary steps to take. If any texture was applied to the finished models, without these steps taken, the texture would appear as "smeared" upon the whole rigid model - creating an uneven and pixelated surface to the model.
To eliminate this issue, we will use UV mapping tools within Maya that create pixel mappings on the faces of the 3D models. The cart models will have their surfaces split into suitable face partitions. The key here is to make sure to include all the face elements of a model, or risk getting an uneven surface mapping that will most likely affect the texture quality later on in Unity.
 |
| Cart model after UV mapping applied. |
Once the surface has been divided into smaller face parts throughout the 3D model it is time to move on to the next step: checking the quality of the created texture mapping. Luckily, Maya has a neat feature called "checkered tiles" that will display a checker board with various colors, functioning as a generic texture. With this tool it is now easy to spot any uneven splits, size issues, or any other kind of unevenness to edit prior to exporting the texture-ready model. With the checkered tiles mode activated, each face part can easily be moved to a specific checker board for checking consistency with the rest of the model faces.
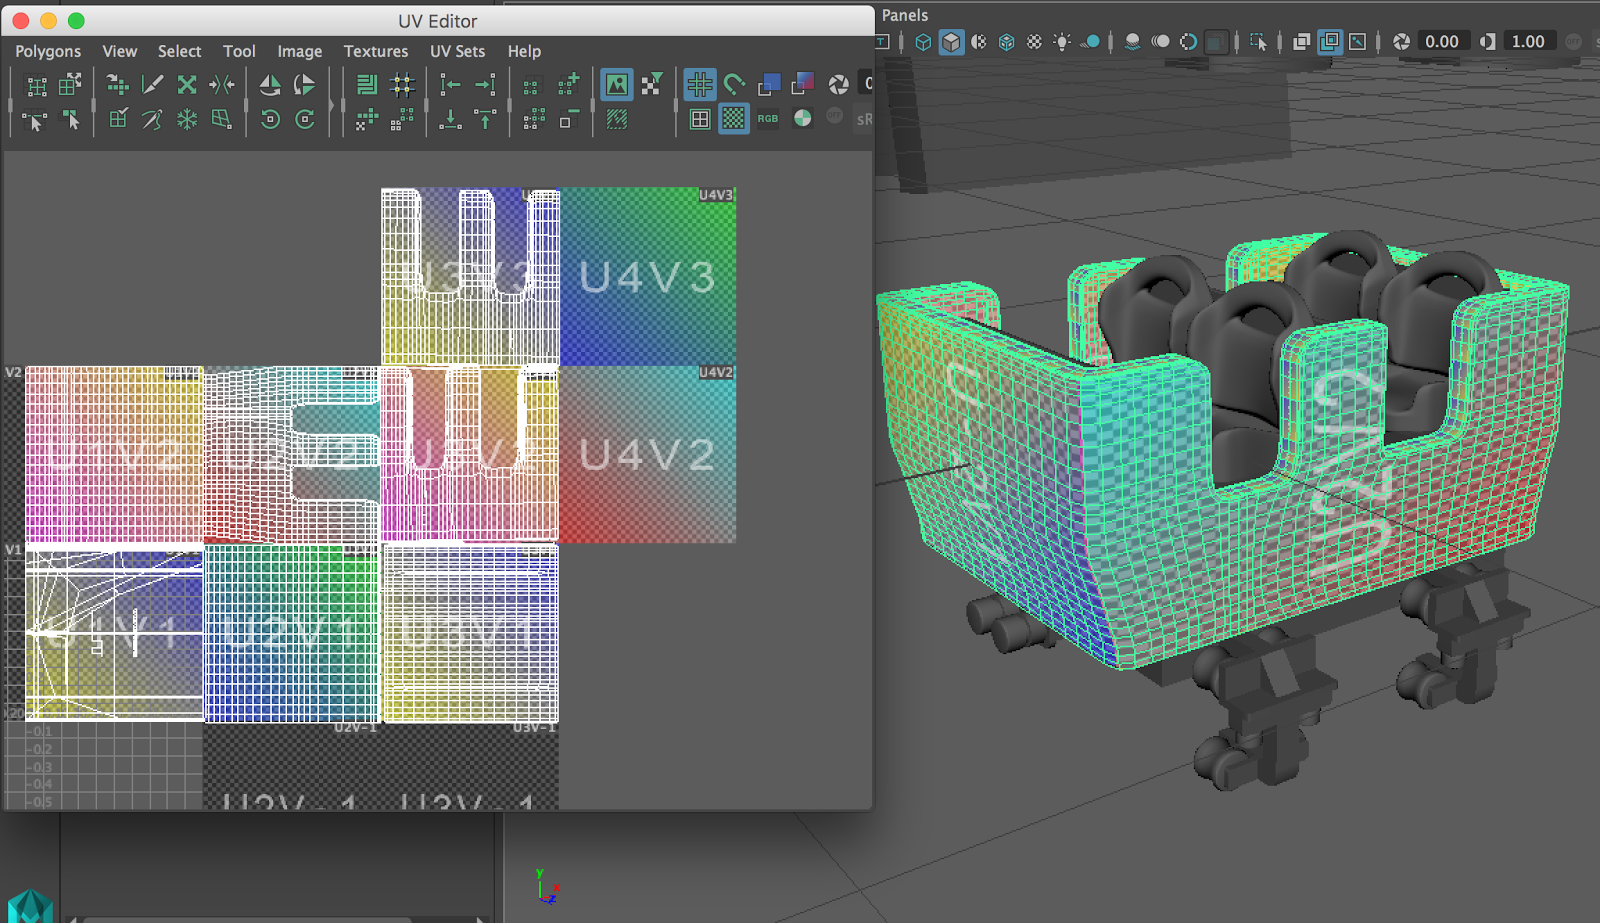
 |
| Checkered tiles mode activated, with each face part visible in the window. |

Inga kommentarer:
Skicka en kommentar