tisdag 8 augusti 2017

Terrain and Aesthetics - Finishing Touches

For the surroundings of the scene, we wanted to add terrain for the track to stand on to improve the aesthetics. This was made using Unity's built-in terrain tool.
The scene with added terrain.
We used textures that I had previously made for personal projects. These were originally created by taking pictures of grass and rock which were then cropped into squares. The resulting pictures were then made seamless in GIMP, using the built in "make seamless" function.
The used grass and rock textures.
Normal maps were automatically created for these textures using the website: http://cpetry.github.io/NormalMap-Online/
The normal maps that were auto generated from the website.
We also used a previously created texture to create grass clusters. This texture was made using the following pictures of grass straws.
Cut out grass straws from pictures of grass.
The grass straws in the above picture were copied, scaled, rotated and skewed, which created the following sprite.
The grass cluster sprite.
Using the built-in terrain tool in unity, billboards with this texture was used to decorate the terrain and the grass and rock textures were used to paint the terrain.
The final look with painted terrain and added grass details.

måndag 7 augusti 2017

Textured seats and first person camera.


The seats that were previously UV-mapped got a leather texture added to them. The texture in Unity had its wrap mode on repeat the tiling of the material was adjusted to make the texture an appropriate size in comparison to the model. The texture and material can be seen below, both separately and on the seat.
Leather texture and material.

Textured seat model.
 Additionally, a camera was set up to give the option of letting a viewer see the cart movement in first person mode. This camera was set up through a simple follow script that makes the camera object follow an empty game object (called Camera Follow), which is a child to the front cart. The Camera Follow is placed slightly above the card to simulate the position the head would be in. The camera follows the target using linear interpolation of its own position and the position of the Camera Follow game object. Likewise, the rotation (quaternion) of the camera is also gotten through linear interpolation between the rotation of the camera and its follow target. The speed at which each value is interpolated was adjusted to make the camera follow the carts position and rotation at a good pace. Video of the first person camera (together with the third person perspective of the ride) can be seen at the bottom of the post.

Camera Follow variables.


måndag 24 juli 2017

Final Textures

Now that we have properly mapped UV properties for all of the cart components it was time to create some neat textures for the carts. In lack of other ideas, I chose to decorate our carts with one of the most popular (and oldest) Internet memes: Nyan Cat.
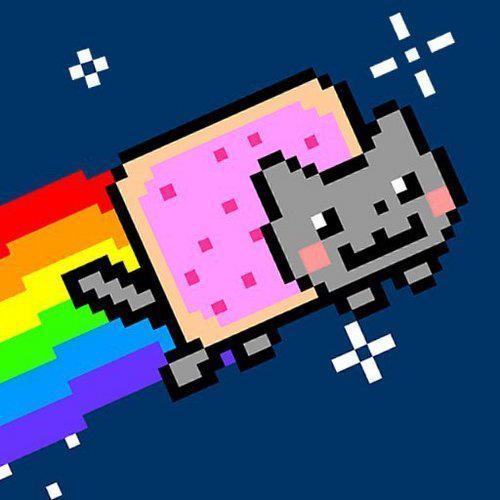
Nyan Cat!
When the UV mappings are finalized within Maya you can choose to export the mappings to a PSD map, which makes it possible to create textures with proper dimensions utilizing Photoshop.
In order to create a seamless texture, it is important to fit the texture images into the UV maps by using some of Photoshop's available manipulator tools, such as perspective and skew.

Down below are some of the most prominent textures created:

Textures for the back carts
Textures for the front cart

 And some textures for the smaller components of the carts can be found below:

Textures for the front cart magnets

Textures for the cart wheels, created by using a seamless plastic-like material

And here is what it looks like when all the external textures are applied in Unity:

External textures of the cart


söndag 23 juli 2017

Cart UV Updates

A UV mapping has been created for the shell of the front cart. The layout of the UV mapping for the back cart was updated as well to be more similar to the front cart's mapping.

The UV mapping for the front cart shell.
The new UV mapping for the back cart

New Track

A new track was created to make a more exciting roller coaster. The track was created by extruding the three rails along a curve. The supports between the rails were added afterward, using an animation snapshot (like the original technique we used) along the same curve.

The new roller coaster model, imported in Unity.
The track was imported into Unity and the carts were added to see how they would move along the new track. This did not work very well, however, as the carts failed to gain any momentum from the steeper fall in the track. To mitigate this, a script was created which gives the carts a target speed. Triggers were then put at different places on the track which changes the target speed.

Triggers on the track that changes the target speed of a cart.
After this, the Animation worked well. While the movement of the carts is still physically based, it is slightly modified at specific key points of the track to get a more natural animation.

tisdag 4 oktober 2016

Texturing: Seats

UV-mappings were created and optimised to have as few visible seems as possible. A separate mapping was created for the top part of the seat and one for the lower part. The UV-mappings for each part can be seen below:

UV mapping for the lower part of the seat.
UV mapping for the top part of the seat.
The lower part of the seat has small patches of UV faces not connected to the rest of the UV, those parts of the model are not visible. For the top part of the seat the corresponding horizontal box area (just below the separate UV faces in the first picture) of the UV mapping is instead merged with the rest of the UV mappings, creating the convex "ear" shapes in the UV mapping seen in the second picture. This is done to ensure that the seem on the sides of the model are removed, which were otherwise in risk of being seen.

måndag 5 september 2016

Texturing: Revamp

As the UV mapping was finished during last Maya session (see blog post "Texturing") the final cart texture was imported into Unity and a seamless texture was applied. A fully seamless texture, as the one shown down below, gave promising results to the cart model after the UV mapping. However, as soon as we wanted to apply custom textures made by us the results suffered a bit due to not having full control over the UVs created, and the positioning of the mappings.

Example of a seamless texture with no text properties.
So I was forced to take precautions by revisiting the Maya files and create more clean textures that were easier to have custom textures and perhaps texts applied to them. Even pieces with correct size attributes were created. The final results and UV mappings are shown in the pictures below.


Complete UV mapping of the cart shell.
Complete UV mapping of the wheel suspension, applied to all four.

Complete UV mapping of the cart wheels, applied to all 16. Smaller wheels (located above the big wheels) were also separately UV mapped.